
How to Organize Under the Kitchen Sink Step by Step

The cabinet under your kitchen sink is one of those places where things just… end up. Cleaning sprays, sponges, trash bags, random bottles you forgot you bought — it all gets shoved in there until opening the door feels like a risky decision.
The good news? You don’t need a full remodel to fix it. With a simple step-by-step approach, you can turn that awkward, pipe-filled space into an organized, easy-to-use storage area.
Let’s do this.
Step 1: Empty Everything Out
This step might feel obvious, but most people try to “organize around” what’s already in the cabinet — and that never really works. You need a full reset.
Take every single item out from under the sink and place it on the counter or floor where you can see it clearly. Don’t leave “just a few things” behind. When the cabinet is completely empty, you get a realistic idea of how much space you actually have and what shape it’s in.
As you pull things out, pay attention to what’s been hiding back there. Under-sink cabinets are famous for:
- Half-used bottles you forgot about
- Duplicate cleaners you didn’t realize you already had
- Old, hardened sponges and worn-out scrub brushes
- Random items that don’t belong there at all
Create three quick piles:
- Keep – Products you actually use
- Trash – Empty, expired, or broken items
- Relocate – Things that belong somewhere else (tools, light bulbs, etc.)
Be honest with yourself. If you haven’t used a product in a year, you probably don’t need it taking up prime space.
Once the cabinet is empty, take a few minutes to clean it properly. Vacuum or wipe out crumbs and dust, then use a damp cloth with mild cleaner to remove sticky residue or old spills. Pay special attention to the back corners and around the pipe area — that’s where grime tends to build up.
Starting with a truly clean, empty space makes the rest of the organizing process easier and way more satisfying.
Step 2: Check for Leaks and Protect the Bottom
Now that everything is out, you have a rare, clear view of your plumbing — take advantage of it.
Look closely at:
- The pipes under the sink
- The joints and connections
- The bottom of the cabinet itself
Run your hand along the pipes to check for moisture. Look for water stains, soft wood, bubbling cabinet lining, or a musty smell. Even a slow drip can cause long-term damage, and this is often the only time people notice it.
If you see anything suspicious, it’s worth fixing before you load the cabinet back up. Organizing on top of a hidden leak just leads to mold, warped cabinets, and ruined supplies.
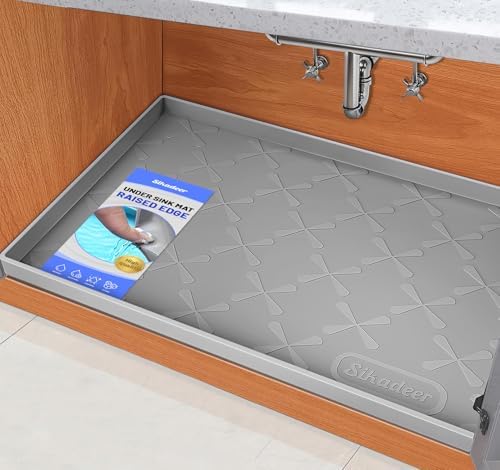
Once you’re confident everything is dry and in good shape, add a protective layer to the base of the cabinet. This step is a game changer.
You can use:
- A waterproof shelf liner
- A large plastic tray
- A shallow storage bin that covers most of the bottom
This barrier catches small leaks, spills from cleaning bottles, or drips from wet sponges. Instead of soaking into the cabinet, the mess stays contained and easy to wipe up.
Think of it as insurance for your cabinet — simple, cheap, and very worth it.
Step 3: Group Items by Category
Before putting anything back, resist the urge to just “fit things in.” Instead, sort everything into clear categories. This is what turns random storage into a system.
Lay all your “keep” items out where you can see them and start grouping similar things together. Typical under-the-kitchen-sink categories include:
- Everyday cleaning supplies
(All-purpose spray, disinfectant, dish soap, sponges) - Dishwashing products
(Dishwasher pods, rinse aid, scrub brushes) - Trash and recycling supplies
(Garbage bags, recycling liners, compost bags) - Occasional or deep-clean items
(Drain cleaner, stainless steel polish, descaler) - Tools and extras
(Gloves, extra cloths, small brushes)
This step does two important things:
- It shows you how much space each category really needs
- It helps prevent overbuying in the future because you can clearly see what you already have
If a category is huge (for example, 10 different spray bottles), that’s a sign you might want to simplify. Keeping fewer, multipurpose products makes under-sink storage much easier to manage.
Step 4: Use Bins to Create “Zones”
Under-sink cabinets are awkward. The pipes cut through the middle, the space is deep and dark, and things tend to get lost in the back. That’s why loose storage almost always turns into a mess.
Bins are the secret weapon here. They turn one big, chaotic space into smaller, controlled zones.
Choose a few small or medium-sized bins that fit around the pipes. Clear bins are helpful because you can see what’s inside, but solid bins work just as well if you label them.
Assign each bin a purpose based on the categories you created:
- One bin for everyday cleaning products
- One for dishwashing supplies
- One for trash bags and liners
- One for less-used specialty cleaners
Instead of bottles scattered everywhere, each group now has a “home.” When you need something, you pull out the whole bin instead of digging around blindly in the back.
Bins also:
- Prevent items from tipping over
- Contain leaks if a bottle spills
- Make it easier to take everything out quickly when cleaning the cabinet
This step is where your under-sink space starts to feel intentionally organized instead of just “less messy.” And that makes a huge difference in how easy it is to keep it that way.
Step 5: Use Vertical Space (Don’t Waste the Height)
Most people only use the floor of the cabinet and forget there’s valuable vertical space going unused. Even with plumbing in the way, there’s usually room to build upward.
Start by measuring the height of the cabinet and the space around the pipes. Then look for ways to stack storage safely:
- Stackable shelves can double your usable surface area. These are perfect for shorter items like sponges, dishwasher tablets, or small spray bottles.
- Tension rods placed horizontally across the cabinet can be used to hang spray bottles by their triggers. This keeps them off the bottom surface and frees up room underneath.
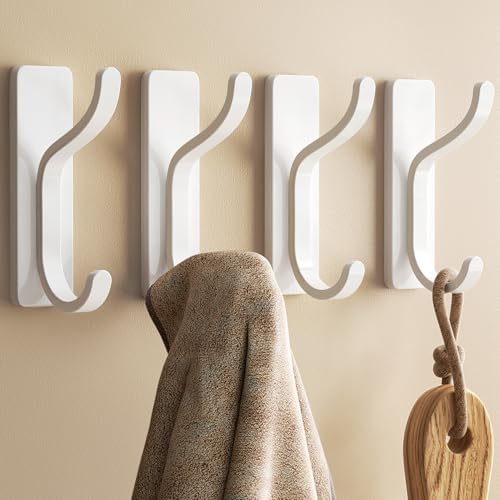
- Adhesive hooks on the inside walls or doors are great for hanging gloves, small brushes, or cleaning cloths.
The goal is to keep the cabinet floor from becoming a pile-up zone. When items are layered thoughtfully, you can see everything at a glance instead of having to move five things just to grab one.
Vertical storage also helps protect items from small leaks, since fewer things are sitting directly on the cabinet base.
Step 6: Store Backups and Bulk Items Somewhere Else
Under the kitchen sink should be for working supplies, not long-term storage. One of the biggest causes of clutter is stuffing bulk refills and backups into an already tight space.
Take a look at how many extras you’re keeping:
- Multiple refill bottles
- Large packs of dishwasher pods
- Rolls of trash bags you won’t need for months
Keep only one backup of your most-used essentials under the sink. Everything else can go in a pantry shelf, laundry room cabinet, or storage closet.
This does two things:
- Makes everyday items easier to reach
- Prevents the cabinet from becoming overcrowded again
Think of the under-sink area as a “grab-and-go” zone. If you have to dig through bulk supplies every time you need dish soap, the system won’t last.
Step 7: Make Frequently Used Items Easy to Grab
Not all items deserve equal space. The things you use daily should be the easiest to reach — ideally without bending, digging, or moving other products.
Place your most-used items toward the front and center:
- Dish soap
- All-purpose cleaner
- Sponges or scrub brushes
Less frequently used products (like oven cleaner or drain treatment) can go in the back or higher up on a shelf.
You can also create a small “daily cleaning caddy” inside the cabinet. Put your go-to supplies in a portable bin so you can quickly pull everything out when wiping counters or cleaning the sink. When you’re done, the whole caddy goes right back in.
This setup saves time and reduces frustration — and when things are easy to access, you’re much more likely to put them back where they belong.
Step 8: Label and Maintain the System
Organizing once is great. Keeping it organized is the real win — and labels help more than you might think.
Label the bins or zones clearly:
- “Daily Cleaning”
- “Dishwasher Supplies”
- “Trash Bags”
- “Extra Tools”
This makes it obvious where things belong, not just for you but for anyone else in the household. It also stops items from slowly drifting into random spots.
Maintenance is simple if you make it a habit:
- Do a quick reset once a week when you take out the trash
- Wipe up spills right away
- Every few months, do a mini declutter and toss empty bottles
Because everything now has a designated place, tidying up takes minutes instead of turning into a full reorganization project.
And that’s the real goal — not a picture-perfect cabinet, but a system that stays functional in everyday life.
Recommended Products for Organizing Under the Kitchen Sink
You don’t need a full cabinet makeover — just a few smart organizers that help you work around pipes and tight spaces.
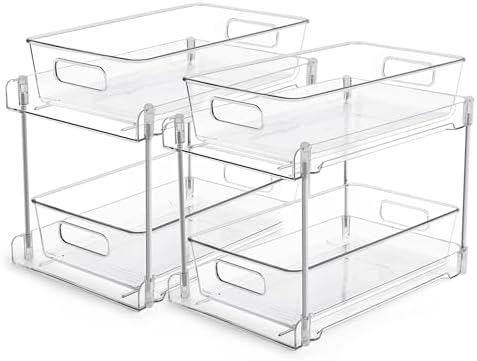
Stackable Under-Sink Shelves
Expandable or stackable shelves are ideal for working around plumbing. They create a second level of storage so you can place lighter items like sponges, cloths, or dishwasher pods on top while keeping bottles below.


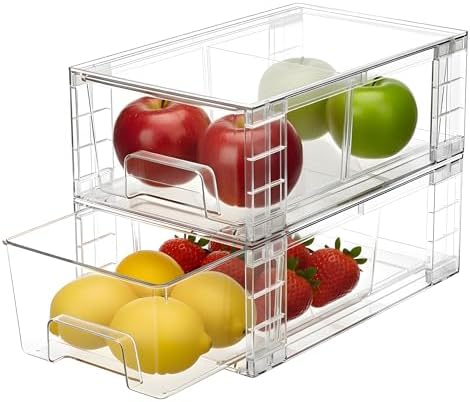
Pull-Out Storage Bins
Deep cabinets make it easy for items to get lost in the back. Pull-out bins or sliding organizers let you access everything without crawling on the floor and reaching into dark corners. They’re especially useful for grouping cleaning supplies or dishwashing products.


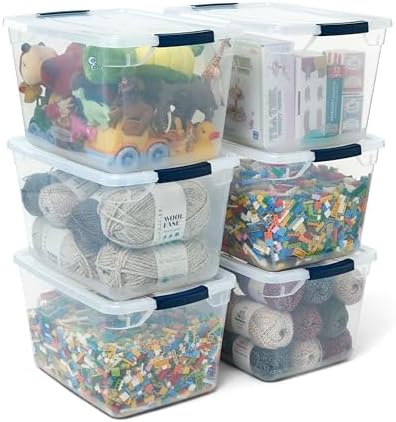
Clear Plastic Storage Bins
Simple clear bins help you create categories like “daily cleaners,” “trash bags,” or “extra supplies.” Because they’re transparent, you can quickly see what’s inside. They also contain leaks if a bottle spills.


Tension Rod for Spray Bottles
A small tension rod installed across the cabinet can hold spray bottles by their triggers. This keeps them off the cabinet floor and frees up space underneath for other items.

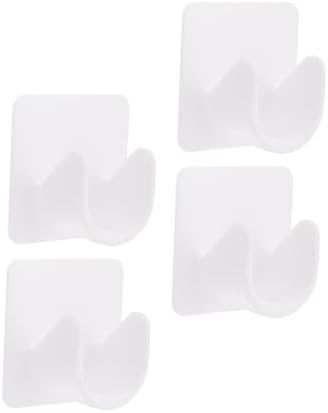


Adhesive Hooks or Door Racks
The inside of the cabinet door is often wasted space. Hooks or slim door-mounted racks are perfect for hanging rubber gloves, small brushes, or microfiber cloths.


Waterproof Shelf Liner or Drip Tray
Protect the base of your cabinet with a waterproof liner or plastic tray. It catches drips and small leaks, making cleanup easier and helping prevent cabinet damage over time.


Small Cleaning Caddy
A portable caddy keeps your most-used cleaning products together. You can pull it out when cleaning the kitchen and return it to the cabinet when you’re done — no more grabbing items one by one.


These simple tools help you turn an awkward, pipe-filled cabinet into an organized, easy-to-maintain space that actually supports your daily routine.
As an Amazon Associate, I earn from qualifying purchases.